Tuesday, 13 January 2009
New Project...
if you just can't get enough of my beautiful animations then head over to www.edgleyindustry.blogspot.com to see the new project I am currently working on, or follow the CVA 204 link to the right!
Friday, 12 December 2008
FINISHED!
Well i just thought I'd post my last DDP post to say how much I've enjoyed working with you guys. Right from the beginning we all had the same vision for the type of style we wanted to achieve from our environment, and we often referred to "squint" as our aim to quality. Well I can safely say I think we bettered squint, I love our film and I think we've set new boundaries for other 1st years to look up to as we did.
I didn't know either of you 2 well at the start of this term, I don't even think I'd said more than 2 words to you in the whole of the 1st year, and yet went on to not only become friends good friends at the end of this, but produce a film that was better than any of the high hopes I had! It has honestly been a pleasure working with you 2, theres been lows - stairs, water, importing character, painting weights, image planes, rendering!! to name but a few, but nothing beats the high of seeing this thing done now. I think I must have watched it like 50 times now!
Phil was the rationalist within the group, making us set realistic targets and scrap ambitious ideas, not to mention his great animation and modelling talents (shame he couldn't use his talents to bargin down the price of cheese in the canteen this term!) He was always in early (well except for the final week, huh~?! lol) and stayed late with me in college the whole way through, so no need to question his dedication to the project.
Dave has been so enjoyable to work with simply because of his continous upbeat mood, and making me laugh just by describing the maya problems at times, or even looking at me lol. There were times when I had to push him to put that extra bit of effort in to make the mansion scene just that bit better, and I think he'll agree it was constructive and worth it. I am blown away by how good the exterior of our mansion looks, its so simple yet vibrant and proffesional, love it. His rigging skills were vital to Lil G even existing, without them we would of had no animation what so ever, so thanks mate.
And I hope I have been ok to work with, I have found out alot more about myself over the 9 weeks, including that I am a serious perfectionist, I am not as laid back with ideas as I thought, I can be stubborn at times which I'm not sure is good or bad. I also somehow take on a directorial role without meaning to, I just love to be organised and know who's doing what and set targets.
I also believe my strengths lie in animating and character design and modeling. I did not enjoy texturing and lighting at all. I also found modeling an environment alot different to that of a character, I was constantly modeling with neat edge flow and thinking about keeping everything uniformed and one object. I've come to realise it can all be done alot easier with overlapping objects, boolean tools, bump maps etc etc.
I hope we have the chance to work again, re unite DDP's winning formula, and keep knocking them show reel pieces out there! The final film can be seen on the DDP main blog. Thanks again boys.
Tuesday, 9 December 2008
Render Week - A Progress Update
I saw the light
Ok Monday began and I fell into the usual trap of tweaking for hours. I made extra statues for the foyer, changed textures, tweaked lights, changed bump depths until it reached about 2.00pm and I decided I preferred it how it was at the start of the day. I then came to the conclusion that there comes a point in a scene where less is better.
The simplistic style we have our hearts set on can so easily get overpowered by cluttered ornaments and realsitic textures, and I am trying too hard to improve what I now realise is already the finished article. I could spend probably another month tweaking the textures, models and lighting in my foyer to get it exactly how I want it, but at the end of the day there simply isn't time. It's wierd because I am totally happy with animation, which is what leads me to believe I am better at that, plus the fact I enjoy it way more! Anyway I have been told by Dave many times that I am a serious perfectionist, and so I decided to listen to him and "just leave it!"
Render Farm
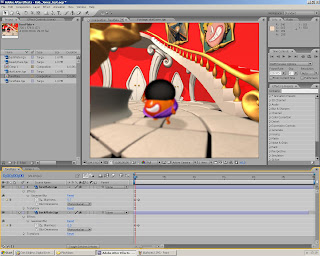
So after realising it was just a case of rendering this week and not devoting more time on the to touching up I just cracked on with the render farm. I was a bit confused on how to use it at first and where my project should go, how to re assign textures, what settings to put in the submit box etc. However I seeked the help of others who had already experieced these problems with the farm and everything started to become clear. Team authentic had already battled it out with the farm a few days earlier and so Dan and Simon had alot of advice to give. I had to copy the project to vanguard, and set my batch rander settings up within the maya file. Textures did not have to be reassigned just simply placed in the texture folder of the project. Then all that was needed in the submit options is a name, frame number bracket, a scene and project directory, as well as a complete folder to send it to. Check which renderer your using, and the frame padding and submit!
The first test render I sent started to take a ridiculous amount of time to render - longer than if I had used my desktop and so I knew there was a problem. I went into the maya file and realised I had left all of my render layers on R - therefore it was basically rendering 5 times my 600 frames, all of which contained the character, dome etc. !!! I switched everything but master off the render and all was well.
My last problem was when I matched all the individual sequence layers up in after effects, they were not compositing properly, and overlapping etc. Plus I noticed missing objects and tiles etc. This was nothing to do with the render farm just me being dumb - I had not added all the objects in my scene to the layers, and had not divided the scene in 2 properly for the DOF. I quickly altered my mistakes in the maya file and rendered only what needed to be composited the rest I decided to just use master layer - why layer at times when its not needed? I dont know why I didn't in the 1st place.
Progress
So its now Tuesday night and I have successfully rendered out at least half of my foyer scene and imported the footage into premiere. I had a few problems today in which the render farm was spitting back batches with random frames missing i.e failing. This meant I had like 40 random frames missing in the middle of my animation and was causing a nasty flicker. I decided to redo the whole render rather than type in each individual frame number that was missing into the farm and then have to place them in the right order in the folder - LONG. It worked fine the 2nd time, and all i did different was just render one layer at a time rather than setting all layers to R. I am still slightly unhappy with the brightness of the foyer looking at the final renders now, and the lack of depth on the walls is a bit of an eye sore, as well as this the domes texture is hard to see with the ..... wait no I have to stop this - its fine, its just the perfectionist coming out again. I will leave it!
Tommorow I hope to finish all rendering and begin editing, importing sound, playing with DOF, and titles. Only 3 more days to go, the earlier rendering is out the way the better, everyones going to be using it now.
Dave's Issues
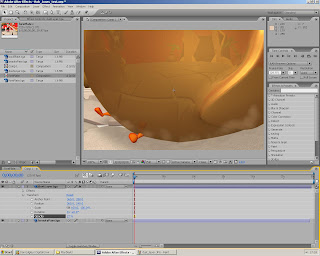
Sat with Dave today for a long time and helped him with a few problems with his mansion exterior scene. 1st we matched Mr Solly's music with his camera movements, so it moved in beat. Easily solved. 2nd problem was a long morning-lunch session. The front door in daves scene was not rendering with mental ray to look like the front door I rendered in maya software. They needed to be indentical to make the transition from one shot to the next smooth. For some reason even with the same gold texture on mental ray was spitting it out like a crusty poo bagel colour lol. Anyway we spent ages trying to change it to match my render and gave up as it just wasn't working. Then Dave had the ingenious idea of rendering just the door with maya software on a seperate layer, and therefore it should work!? We changed to software and it still looked poo, so we had to play with the blinn texture more, until I cracked it by typing in a specular roll off colour high than the maximum 1 the slider was allowing. 2 did the trick and we had a matching gold texture. Then it was a case of changing lights and adding the mansion to a seperate layer to the door etc. Altering shadows etc. etc. the list goes on. See his blog for more detail!
Anyway the last job was to sort out a background image which has been on our minds from day 1. I helped him import phils cloud designs onto 2D polygon planes which Nathan showed us how to create using the create path tool in photoshop. We then animated them to move slowly, and encased the whole scene in a sky blue dome rather than a flat 2D image which wasn't working. Then we added some simple overlapping green spheres to achieve distant hills, and whola! It looked simple yet effective. We stayed to like half 7 rendering his scene and attempting to composite the door and mansion but it failed miserably with the door gliding over the top of the mansion layer. However.... we know how to solve this.... and we will tommorow!
Ok Monday began and I fell into the usual trap of tweaking for hours. I made extra statues for the foyer, changed textures, tweaked lights, changed bump depths until it reached about 2.00pm and I decided I preferred it how it was at the start of the day. I then came to the conclusion that there comes a point in a scene where less is better.
The simplistic style we have our hearts set on can so easily get overpowered by cluttered ornaments and realsitic textures, and I am trying too hard to improve what I now realise is already the finished article. I could spend probably another month tweaking the textures, models and lighting in my foyer to get it exactly how I want it, but at the end of the day there simply isn't time. It's wierd because I am totally happy with animation, which is what leads me to believe I am better at that, plus the fact I enjoy it way more! Anyway I have been told by Dave many times that I am a serious perfectionist, and so I decided to listen to him and "just leave it!"
Render Farm
So after realising it was just a case of rendering this week and not devoting more time on the to touching up I just cracked on with the render farm. I was a bit confused on how to use it at first and where my project should go, how to re assign textures, what settings to put in the submit box etc. However I seeked the help of others who had already experieced these problems with the farm and everything started to become clear. Team authentic had already battled it out with the farm a few days earlier and so Dan and Simon had alot of advice to give. I had to copy the project to vanguard, and set my batch rander settings up within the maya file. Textures did not have to be reassigned just simply placed in the texture folder of the project. Then all that was needed in the submit options is a name, frame number bracket, a scene and project directory, as well as a complete folder to send it to. Check which renderer your using, and the frame padding and submit!
The first test render I sent started to take a ridiculous amount of time to render - longer than if I had used my desktop and so I knew there was a problem. I went into the maya file and realised I had left all of my render layers on R - therefore it was basically rendering 5 times my 600 frames, all of which contained the character, dome etc. !!! I switched everything but master off the render and all was well.
My last problem was when I matched all the individual sequence layers up in after effects, they were not compositing properly, and overlapping etc. Plus I noticed missing objects and tiles etc. This was nothing to do with the render farm just me being dumb - I had not added all the objects in my scene to the layers, and had not divided the scene in 2 properly for the DOF. I quickly altered my mistakes in the maya file and rendered only what needed to be composited the rest I decided to just use master layer - why layer at times when its not needed? I dont know why I didn't in the 1st place.
Progress
So its now Tuesday night and I have successfully rendered out at least half of my foyer scene and imported the footage into premiere. I had a few problems today in which the render farm was spitting back batches with random frames missing i.e failing. This meant I had like 40 random frames missing in the middle of my animation and was causing a nasty flicker. I decided to redo the whole render rather than type in each individual frame number that was missing into the farm and then have to place them in the right order in the folder - LONG. It worked fine the 2nd time, and all i did different was just render one layer at a time rather than setting all layers to R. I am still slightly unhappy with the brightness of the foyer looking at the final renders now, and the lack of depth on the walls is a bit of an eye sore, as well as this the domes texture is hard to see with the ..... wait no I have to stop this - its fine, its just the perfectionist coming out again. I will leave it!
Tommorow I hope to finish all rendering and begin editing, importing sound, playing with DOF, and titles. Only 3 more days to go, the earlier rendering is out the way the better, everyones going to be using it now.
Dave's Issues
Sat with Dave today for a long time and helped him with a few problems with his mansion exterior scene. 1st we matched Mr Solly's music with his camera movements, so it moved in beat. Easily solved. 2nd problem was a long morning-lunch session. The front door in daves scene was not rendering with mental ray to look like the front door I rendered in maya software. They needed to be indentical to make the transition from one shot to the next smooth. For some reason even with the same gold texture on mental ray was spitting it out like a crusty poo bagel colour lol. Anyway we spent ages trying to change it to match my render and gave up as it just wasn't working. Then Dave had the ingenious idea of rendering just the door with maya software on a seperate layer, and therefore it should work!? We changed to software and it still looked poo, so we had to play with the blinn texture more, until I cracked it by typing in a specular roll off colour high than the maximum 1 the slider was allowing. 2 did the trick and we had a matching gold texture. Then it was a case of changing lights and adding the mansion to a seperate layer to the door etc. Altering shadows etc. etc. the list goes on. See his blog for more detail!
Anyway the last job was to sort out a background image which has been on our minds from day 1. I helped him import phils cloud designs onto 2D polygon planes which Nathan showed us how to create using the create path tool in photoshop. We then animated them to move slowly, and encased the whole scene in a sky blue dome rather than a flat 2D image which wasn't working. Then we added some simple overlapping green spheres to achieve distant hills, and whola! It looked simple yet effective. We stayed to like half 7 rendering his scene and attempting to composite the door and mansion but it failed miserably with the door gliding over the top of the mansion layer. However.... we know how to solve this.... and we will tommorow!
Musical weekend
Over the weekend I provided my good friend John with the latest playblast of our film so he could get started on producing some cribs music to accompany it. I had total faith in him, as he is a well respected music producer, and has produced beats for some big names in his time. I spent the best part of Saturday with him in his studio giving my thoughts and opinions for song choice, as well as explaining to him how I invisinged the music working. I managed to give him a rough brief however I wanted him to have a creative input into the track and let him do his thING. We then watched a few cribs episodes for inspiration. We agreed it had to have the following qualities:
- Upbeat and fast paced
- recognized R n B / Hip hop tunes
- Maintain the MTV cribs style
- Contain no swearing
- Have a big build up upon entering the front door
- Have record scratches and jolts to match the camera
- Include sound fx
- Fun
- Each track had to mix flowingly into the next on beat
- "Benny benessi - satisfaction" had to be included for the thong scene!
I think those were the main issues we addressed. Anyway he was amazing, he did everything I asked and more. We agreed on every song choice and everything seemed to fit into place. We even managed to get lyrics to match things that were happening on screen e.g lethal bizzle pow's on every picture frame, and house of pains jump when pony jumps, as well as the word down for when he falls haha. He managed to custom mix the songs to match our cuts, and have the tracks land on beat and in time. It was difficult at first because john quickly pointed out that MTV cheat their track mixes by using the time when the celebrity talks (the dialogue) to drown out the mix. As our character has no dialogue his mixes had to be spot on. The music really really brings the film to life, I can't stress how much it's improved it visually in a wierd way. I'm so chuffed with the sound I can't wait to hear it with the final rendered film instead of a shitty playblast.
Anyway theres not much more to be said other than I owe him a big thankyou and everyone better watch out coz our films gnna blow u away - aswell as your ear drums!
Thursday, 4 December 2008
All Problems Sorted Thanks to Rob
Rob helped me solve:
My Render Layers, Dust Particles, Depth of Field, Rendering problems
My Depth of Field Layers


Smoke Layers

My Render Layers, Dust Particles, Depth of Field, Rendering problems
My Depth of Field Layers


Smoke Layers


Inspiration
Rob showed us a very similar spoof crib animation which is quite amusing and fits the bill with xmas on the way....
http://uk.youtube.com/watch?v=qH3nLEek_YE
http://uk.youtube.com/watch?v=qH3nLEek_YE
Wednesday, 3 December 2008


Monday, 1 December 2008
Welcome to the house of fun...
Needs quite a bit of tweaking but the key frames are there. I feel better now we have a bit of animation under way. Motion blur will play a big part in our characters quick movements. I created some quick blendshapes for the mouth and eyes but they can easily be changed and rekeyed. Please comment for thoughts guys...
Friday, 28 November 2008
Animatic and Importing Character
Animatic
I have spent yesterday and today working on my MTV camera sequences. I had to create a number of different cameras to achieve the different shots I required. I was constantly referring to my original storyboard as well as MTV crib episodes on youtube to help me maintain the right look and feel. As pointed out by Jared, if I do not replicate MTV's shoddy fast camera sequences correctly it will look more like I am just really bad and ameturish at animating camera movements. I have to get that distinct balance between slik fast paced shots and juddery hand held movement which MTV is so well known for. The MTV logo and titles will be constantly in the frame throughout the film to keep the audience reminded they are watching an episode of cribs. However I would like to be able to re create their camera work so accurately that the film can be instantly recognized as a cribs episode simply by the camera movement. I used a total of about 7 cameras (all labelled) for the different shots. In some cases to achieve the fisheye sort of views I had to not only key frame the translate and rotate attributes but the focul length and aspect ratio itself. It was quite straight forward but took some time to get just right. I found it much easier to use the perspective view to manually rotate the cameras rather than try moving whilst in the cameras view. I had to use the graph editor to add smoothness between frames (spline), and similarly change the fast paced directional shots to direct movement (linear). I added slight juddery movements to emphasise the hand held style - this was done simply by rotating left and right ever so slightly. I am really pleased with the camera work so far. I have put my shots together in a quick playblast animatic using Adobe premier to put my individual cam blasts together. Hope you like guys, please comment and let me know any shots you'd like added or existing ones changed.....
Importing the character
Dont even get me started - Appointment to be booked with Alex hulse.

Tuesday, 25 November 2008
Finishing touches...
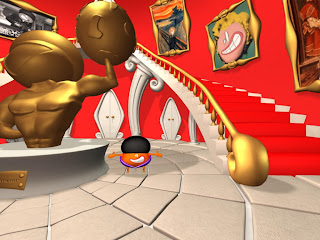
The foyer is pretty much done now, which is a huge weight off my shoulders. I have successfully modelled and textured most of the room and am now in the process of tying up loose ends, adding final small models, texturing the odd thing here and there etc.
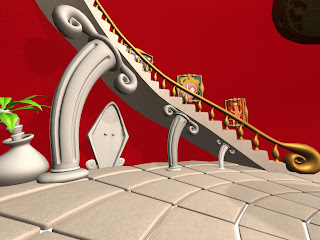
I have spent the best part of this week remodelling the stairs and the bannisters to occupy them. This was so much more difficult than expected because I had to join the bannisters up for the balcony (which were fully smoothed- argghh!). A common problem which I have still not learnt from even though it has happened about 50 times throughout this project is ....not to smooth an object till the very end! It is so annoying when you cant go back far enough in an object history to unsmooth it. The reason for going back to a low poly model is to ultimately carry on working into it, remodel, attach it to another object, pull verts, extrude - anything really. A smoothed model is simply to hard to deal with.
So yeah I had to attach the two mirrored bannisters on the balcony, make the carpet all match up, ensure the architecture under the stairs looked neat and tidy. I then carefully placed the coloumn's to give the wacky illusion that they are propping the stairs up either side. If that wasn't enough I had to texture map the whole thing and apply my cartoony grains and bumps. The stairs have been a long exhausting process and to be honest the worst part of the project for me.
The rest of the time this week has been finishing up texturing, applying the missing ones, touching up existing ones, adding the odd ramp shader here and there to emphasise the vibrant colourful style. Other small jobs included modelling the other arm to the statue, remodelling the palm tress leaves, bannister swirl, texturing door knobs etc etc. The list goes on, as it has been a week full of small jobs so far.
I have got one new image to show my adoring fans is of the newly engraved plak for the statue. I used a simply bump map of black text to achieve the effect. It reads " SIMPLY THE BEST" - we thought that sentance sums up pony's ego in 1....

Monday, 24 November 2008
Longggggg Day
Today I was supposed to create the new stairs and supporting architecture for the foyer by using an old saved file of a perfectly shaped step and then applying the duplicate special tool Mr Hulse had showed me. It was supposed to work perfectly and duplicate to form an entire swirly staircase with casing, a bannister, a smooth under wall, everything really. BUT it failed miserably, and went horribly wrong. There are so many problems that occurred with this method that it is impossible to write them all, I'd be here for hours. I spent absoloutely ages trying to match each step up so the surrounding case was flush and smooth, trying to get the underneath of the stairs to have a smooth celing, the step to be rounded and curvy but the wall edges hard and flat. It was a complete disaster and wasted the best part of a day.
I felt so annoyed because I have spent way too much time getting these stairs right (a total of 6 staircases had been modelled up until this point - all in different ways!) let alone texturing them, and frustration took over me. I resorted to starting over, with the aid of my very helpful and knowledgeable collegue - Alec. Below is a tutorial on how I created my new fab stairs. I give total creative rights to Alec who invented the process:
I started the staircase with a preset ring polygon shape, subdivisions x40.
I then deleted 3/4 of the ring leaving me a rectangular curved quarter.
I set upon extruding each individual face 1 unit high until I had a fairly simple and beutifully smoothed encased stairwell.
I then used the split polygon tool to draw in where I wished the edge of the casing to end, and deleted uneccessary faces.
I was then left with the bare structure of the stairs ready to be given a bottom ceiling. I selected the inside boarder edge of the stairs and extruded inwards to achieve a totally smooth undercasing plane. Already it was looking sooo much simpler and easier to work with.
The next step was the round the stairs and give them the shape I desired by inserting just 2 edges loops down the middle to act as my height curvature. Aswell as raising the verts of these new edges, I selected the faces of the inner section and extruded to form my red carpet!
I then selected the outer edges and corners of each step and beveled them to a value of 2. This bodged up slightly at first however after changing the normal value to 57 rather than 30 everything seemed to just work. First time I had ever dealt with the word normal in maya, and i'm still not exactly sure how it fixed my problem. Something to do with only smoothing angles larger than 90 degrees or something? A new tool was learned anyhow.
Next it was just a case of using a simple 4x4x4 lattice to slightly reshape the stairs to fit the curvature of my dome room, so they overlapped the walls and sat flush. I textured them by simply selecting the faces I wished to be stone, automatic mapped them, applied my grainy stone, selected the faces I wished to be carpet, automatic mapped them, and applied my carpet texture.
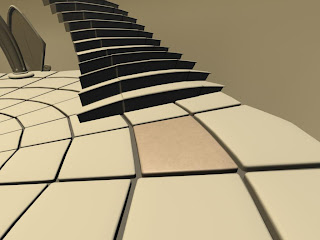
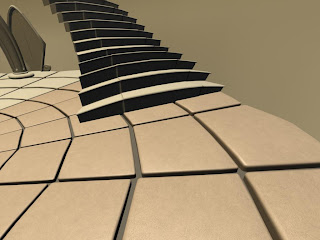
Sounds long but it was in fact 100 times quicker than any method I have used to date. To create my bannister I simply duplicated the individual rails, placed them on each step, and then used the extrude face to curve tool to create the rail itself. I attached the big swirl to the end which gave it a nice touch and stayed truthful to my design. The whole thing was topped off by placing the coloumns in my scene under the new staircase to act as the supports as I had wished. I am very very happy with the new stairs, and now all I have to do is mirror them for the other side of the room. Below are some screenshots of how they turned out:
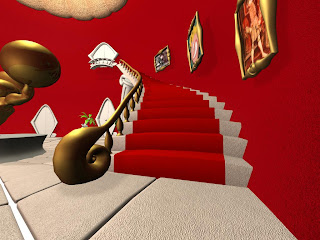
I still need to edit the bump depth on the stair stone texture. Adjust the bannister slightly, aswell as its gold texture (add a grain). I tested having 3 coloumns beneath the staircase prodding it up, however I think just 2 is suitable as the 3rd looks ridiculously small and wierd! Ihave to create the circular balcony landing in between the two stairwells however that will take 5 mins as I will use a flat cyclinder and match up verts. You may have noticed I also had time to import daves front door which he modelled today. Made it huge, and slapped a couple of test colours on it to get an idea of how it will look.
So yeah, been in all day and I'd say 10am - 3pm was unproductive and time wasted, but 3pm - 6.30 was where the magic happened. Hope tommorow goes swimmingly ...
I felt so annoyed because I have spent way too much time getting these stairs right (a total of 6 staircases had been modelled up until this point - all in different ways!) let alone texturing them, and frustration took over me. I resorted to starting over, with the aid of my very helpful and knowledgeable collegue - Alec. Below is a tutorial on how I created my new fab stairs. I give total creative rights to Alec who invented the process:
I started the staircase with a preset ring polygon shape, subdivisions x40.
I then deleted 3/4 of the ring leaving me a rectangular curved quarter.
I set upon extruding each individual face 1 unit high until I had a fairly simple and beutifully smoothed encased stairwell.
I then used the split polygon tool to draw in where I wished the edge of the casing to end, and deleted uneccessary faces.
I was then left with the bare structure of the stairs ready to be given a bottom ceiling. I selected the inside boarder edge of the stairs and extruded inwards to achieve a totally smooth undercasing plane. Already it was looking sooo much simpler and easier to work with.
The next step was the round the stairs and give them the shape I desired by inserting just 2 edges loops down the middle to act as my height curvature. Aswell as raising the verts of these new edges, I selected the faces of the inner section and extruded to form my red carpet!
I then selected the outer edges and corners of each step and beveled them to a value of 2. This bodged up slightly at first however after changing the normal value to 57 rather than 30 everything seemed to just work. First time I had ever dealt with the word normal in maya, and i'm still not exactly sure how it fixed my problem. Something to do with only smoothing angles larger than 90 degrees or something? A new tool was learned anyhow.
Next it was just a case of using a simple 4x4x4 lattice to slightly reshape the stairs to fit the curvature of my dome room, so they overlapped the walls and sat flush. I textured them by simply selecting the faces I wished to be stone, automatic mapped them, applied my grainy stone, selected the faces I wished to be carpet, automatic mapped them, and applied my carpet texture.
Sounds long but it was in fact 100 times quicker than any method I have used to date. To create my bannister I simply duplicated the individual rails, placed them on each step, and then used the extrude face to curve tool to create the rail itself. I attached the big swirl to the end which gave it a nice touch and stayed truthful to my design. The whole thing was topped off by placing the coloumns in my scene under the new staircase to act as the supports as I had wished. I am very very happy with the new stairs, and now all I have to do is mirror them for the other side of the room. Below are some screenshots of how they turned out:


I still need to edit the bump depth on the stair stone texture. Adjust the bannister slightly, aswell as its gold texture (add a grain). I tested having 3 coloumns beneath the staircase prodding it up, however I think just 2 is suitable as the 3rd looks ridiculously small and wierd! Ihave to create the circular balcony landing in between the two stairwells however that will take 5 mins as I will use a flat cyclinder and match up verts. You may have noticed I also had time to import daves front door which he modelled today. Made it huge, and slapped a couple of test colours on it to get an idea of how it will look.
So yeah, been in all day and I'd say 10am - 3pm was unproductive and time wasted, but 3pm - 6.30 was where the magic happened. Hope tommorow goes swimmingly ...
Friday, 21 November 2008
Progress Review
Ok, well lately I've been getting into the habit of just posting screenshots of my days work, reflecting on it, and not paying much attention to how the project is going as a whole. So I'm going to firstly list the things I still need to do asap, and then can refer to the list each day:
Model:
-Stair architecture, balcony floor, globe on statue, swirl at end of bannister, dupe other arm of statue, import front door (daves), make pic frames doors and stairs flush with walls, wall struts (optional)
Texture:
-Plants, pillars, door knobs, doors, grouting in tiles, statue plimpth
Lighting:
Done.
Animating:
- Camera movements - playblasts, then finals
- Character animation
- Globe and floor animation
Render:
- We have decided to render 4 layers - ambient occlusion, shadows, environment, and character. Should speed up time and give a better sense of depth and pro look to our film.
Composite
- Tweak layers in after effects, add sound, and add MTV titles etc.
So yeah, their my objectives for the next 3 weeks, and they sound impossible but most of my texturing can be done quickly, my lighting is done, the only time consuming parts are the extra models and animating. Sound is done, and rendering should be easier now with our 4 layers decided on and Rob's help. I am confident we are going to pull off not only a really nice environment but a successful short film. I wanted to achieve a funny film with character interaction rather than a boring camera flythrough. You never know MTV might want to purchase a whole series of our crib shorts (which I would decline btw due to the amount of stress its taking to make 1!)
I have set out a new set of deadlines which I think is now more appropriate than our original:
Nov 22nd -23rd - This weekend - phil - background painting, dave - rigging, me storyboard.
Nov 24th - Me + phil - Texturing, Dave - rigging
Nov 25th - texture, light, model final things - Dave hand over fully rigged chracter (MUST)
Nov 26th - 28th - All finish texturing, lighting and modelling scene ( dave - front door)
Dec 1st - 5th -Animate camera sequences and shots. Animate any character animation needed. In Daves case if your camera sequence is animated, then start to render. (a week doesn't sound long to animate the character but remember we are only doing simple poses with him, and expressions, no need to go into over detail, he will only be seen 3 times, and each time is pretty simple stuff)
Dec 8th - 12th - Render, composite final film.
I think we can pull off these deadlines if we work hard enough for these last 3 weeks, I will post the deadlines up on DDP blog.
Other than CVA201, Maquette making was very enjoyable however I had to miss a session because time was against me for this project. PPD I don't really understand the point of but am trying my best to update and follow through with this group work thing. Case study is going really well - had my formative with Dan and he was pleased with my progress. I am going to sacrafice today to finish my case study for mondays deadline rather than go in to continue with the project.
Thursday, 20 November 2008
Thanks Rob Jones
Yesterday and today we had Rob Jones come in and teach us how to render layers and passes in maya. He was very helpful and did his best to come round each individual group and give advice on the most suitable way to render our projects. He explained the various layers and technqiues such as ambient occlusion, shadows, rim lighting, Z depth, ambient colour, alpha channels, character and background layers etc. It was a bit much to take in all at once but definately an eye opener. We learnt the basics of how to render these layers and then even more importantly how to composite and adjust them in after effects. I really enjoyed the session and has helped me to gain a better understanding of how big companies achieve the beutiful vsiuals they do. We watched a great film called Duel of the Gentlemen which Rob later used as an example, and broke it down into its individual passes. I hope I can learn enough about after effects and compostiing in time to be able to apply it to our project. He later came round and not only advised the best way for us to render our own films but helped out on alot of technical maya issues I had been having!
Wednesday, 19 November 2008


Tuesday, 18 November 2008
Long Day
"Got alot done - just doesn't look like it" - sums up today. Imported pic frames, textured walls, imported statue, cleaned up my outliner, named things, deleted uneccessary poly's, unsmoothed stuff, etc etc. Basically just spent the day cleaning up my scene, then hours of playing with lighting, mental ray, shadows, the stained glass dome, reflections, bumps.... and ended up getting frustrated. It was too much to learn in one day, but learnt alot about linking lights to objects, mental ray, shadows, drop off rates, glows, raytracing, etc. Bit of a head jam - too much to take in at once. It's coming together now tho. Going to spend tommorow texturing and lighting some more.
Monday, 17 November 2008
Creating and texturing Frames....
Right well I watched "Horton hears a who" at the weekend, and studied the textures used carefully. Upon closer inspection I realised that although simple plain colours were used, they were not just plain lamberts, they all had some form of grainy texture or bump on them, giving them that depth and cartoony realism. I was particularly influenced by the picture frames in the whoville manor. They were exactly the style and colour I wanted to achieve for my foyer picture frames. They too had a slight grainy texture applied to the gold colour applied to them making them look beutifully elegent and warped. Below is a screenshot from the film, displaying the frames I am describing...
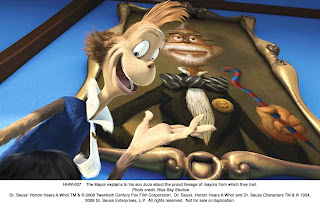
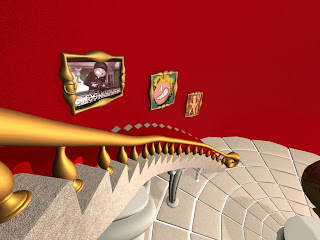
I tried to re-create the same style and texture for my frames today, and applied the paintings within them. I am really pleased with them, I love the grainy bump i managed to achieve with Mr grigsby's help. I ran into a problem with the bump map being stretched and wierd, but it turns out I hadn't UV mapped it properly. With a little help I soon realised I had to planar map the bump file, increase the UV repeat option, and decrease the depth. Anyway they came out like this....
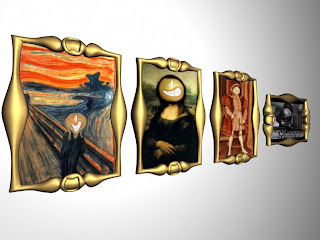
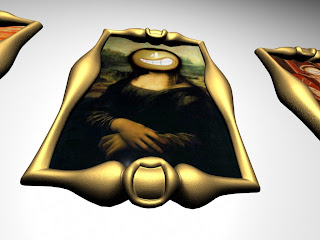
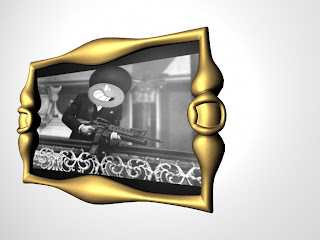 If you click the pictures you can see the bump texture better. I attempted the swirls modelled in the Whoville versions but just couldn't get it to look right, and as pointed out by phil, these picttures will only be seen for like a second each, and the camera flys past them quickly doing its MTV shizzle. So no need to spend tedious amounts of time on things that won't be seen for long. A good days work considering the industry day talks took up most of my time. Bring on tommorow and more texturing!
Sunday, 16 November 2008


Friday, 14 November 2008
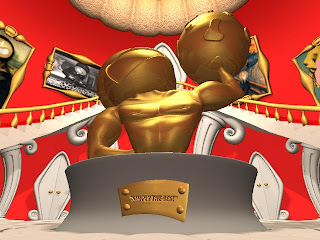
Refining statue
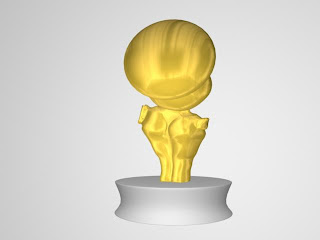
Today I spent a good few hours modelling the muscly arm to support the globe on the foyer statue. Came out quite nice actually, even managed to get a few bursting veins running down it. used a reference image off the net, and modelled to the anatomy similar to how I did with the body yesterday. I also played about with creating my own gold shader as the one I used yesterday i felt was way too reflective and a bit wierd. Experimented with a blinn and ray trace options. i placed the character next to the statue to test whether he was being reflected into the statue, and finally got there using the render globals, and reaytrace/refraction options. Anyhow, a couple screen grabs of todays work...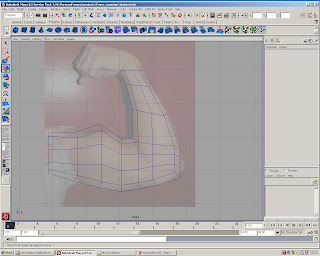


Thursday, 13 November 2008
Statue Modelling....
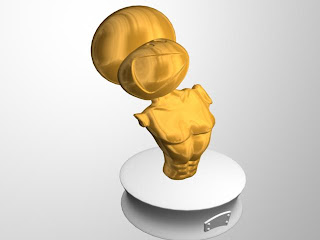
Well today I had a discussion with the group about this statue problem, and pitched my idea for the mounted horse. I showed the guys my concepts and they weren't overly keen on the idea, and if anything thought it would be harder to model a horse than a muscular body. Although i spent time developing my horse idea, I knew deep down they were probably right. Aswell as this Dave mentioned a good point - that the environment/character interaction we had with the globe idea would be lost with a horse. The world rolling off and falling off him made much more sense than a random piece of a statue breaking off. So anyway I agreed and spent the day modelling a human male torso from reference images I found off the net. I used 2 image planes on my side and front view, and focused on defining the anotomy of the chest....
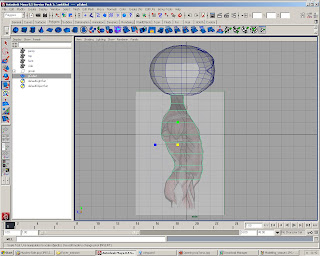
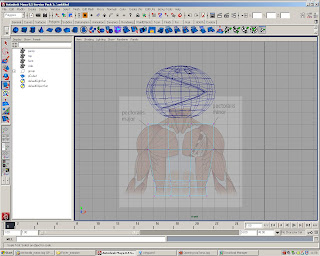
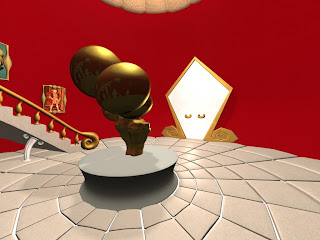
It took me a long time, and I felt like giving up many times, but I kept plugging away and in the end used a lattice deformer to help me reshape it, aswell as exaggerate and cartoonify it. Once happy I attached it to our guys head and applied a smooth. I didn't have time (or the energy) to do the muscly arms or globe today, but I will definately give it a go tommorow. To get a rough idea of how the model would look like with the solid gold texture I'm hoping for I downloaded a gold shader off the internet. It actually came out quiite nice, very similar to an Oscar trophy. I think it looks fine without legs aswell, so I will be sticking to with just the torso, arms, and globe. As for the Afro, not sure whether it looks better with, or without. Another decision for tommorow....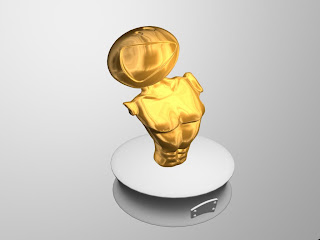


It took me a long time, and I felt like giving up many times, but I kept plugging away and in the end used a lattice deformer to help me reshape it, aswell as exaggerate and cartoonify it. Once happy I attached it to our guys head and applied a smooth. I didn't have time (or the energy) to do the muscly arms or globe today, but I will definately give it a go tommorow. To get a rough idea of how the model would look like with the solid gold texture I'm hoping for I downloaded a gold shader off the internet. It actually came out quiite nice, very similar to an Oscar trophy. I think it looks fine without legs aswell, so I will be sticking to with just the torso, arms, and globe. As for the Afro, not sure whether it looks better with, or without. Another decision for tommorow....


Wednesday, 12 November 2008
Bad day
Today I had a really bad day on maya. As a group we're stumped on how we are going to texture our environment - therefore I couldn't progress with the stairs. We need a talk with Jared tommorow as we are thinking of using simple colours as our textures, because of our cartoony and simple style. I know this isn't great practice in texturing and mapping but sticking in realistic textures like stone on walls etc. ruins the whole thing. Alec helped me try and make a fine grain cartoon texture with a sort of noise affect texture. Which came out ok...
From afar it has the slightly detailed, yet simplistic effect. Not bad, and I learnt a bit about bump mapping and repeating UV's too. I think we are going to try and achieve the sort of texturing used in films like Oktapi, and Horton Hears a Who. I Then I attempted pic frames - failed, wasn't in the mood. Finally I imported the character to test out focal lenses etc. and discovered I had modelled him in centimetres! So then had to spend a while scaling him up into metres. Then was peed off so went home. I am a bit worried about the progress I'm making with the foyer, and how we're going to texture our whole thing. The only concelation from today was that phil managed to create some really nice water for the swimming pool. Hope tommorows a good day....


From afar it has the slightly detailed, yet simplistic effect. Not bad, and I learnt a bit about bump mapping and repeating UV's too. I think we are going to try and achieve the sort of texturing used in films like Oktapi, and Horton Hears a Who. I Then I attempted pic frames - failed, wasn't in the mood. Finally I imported the character to test out focal lenses etc. and discovered I had modelled him in centimetres! So then had to spend a while scaling him up into metres. Then was peed off so went home. I am a bit worried about the progress I'm making with the foyer, and how we're going to texture our whole thing. The only concelation from today was that phil managed to create some really nice water for the swimming pool. Hope tommorows a good day....
Tuesday, 11 November 2008
Project, Life Drawing, and Maquettes!
Today was quite an unproductive day as far as project work goes, not because I was lazy, but because I was too busy attending a life drawing session and a maquette making class! Anyway I managed to spend a couple of hours on our character.

- I started by making his hands bigger, as I felt in my original model they were too small, and would become fiddly to rig and animate. Plus he will be making alot of hand gestures, clenching his fists, or pulling funny muscular poses so we want the hands to be fairly prominant.
- Adjusted the eyes by reducing the poly count (beofre they were on a way too high smooth), and re texturing to a bright white.
- Added teeth - wahey, and what a difference, from the boring ring loop lips, adds much more personality and style. They are a seperate object to the lips, however I grouped them in order to create blendshapes.
- Modelled some simple feet to yesterdays stumps . However I was talking with Dan Dali today and he said the one thing to steer clear of when animating is - characters with small legs!! So its up to Dave whether he wishes to persist with rigging these small legs and feet which may cause a bit of fiddly hassle, or settle for the stumps I gave him yesterday, and he could sort of bounce along from stump to stump?! Dave the choice is yours, the feet I have modelled are clean, and have nice edge flow, but if you have difficulty I have the saved version with the stump legs.
- Played around with textures. I am happy with the ramp shaders applied to the afro, lips, skin, and suit as they fit our cartoon style nicely. I added a glistening shiny white phong shader for the teeth which works. I tried a few ideas for the zip but could really get what I wanted - so the metal zip can be retextured later on after rigging.
- Blendshapes - my conclusion today is that blendshapes are alot easier than what I thought. Its a simple case of duplicating what ever you want to change i.e my mouth and teeth. Altering the new copied version into a slightly different expression i.e sad, happy. I used a bend deformer to achieve a few test expressions, sad, happy, normal. Then going - shift selecting both (source, target) - create deformers - blendshape. Name it etc. Go window - blendshapes, and use the simple slider to watch your old shape blend into the new one. I key framed a few tests and the results were better than expected. I will come back to this later on when we are at the animating stage - add a few more expressions,and touch up the mouth. However I am really happy with the progress so far, and have saved myself time for later on in the project.

Monday, 10 November 2008
Character Modelling....
 Began modelling our character today which was a bigger task than I had expected. Very time consuming as i had to make sure the edge flow and wireframe was neat and tidy so as not to deform when dave rigs it. It "should" be OK as I've kept it very simple and labelled everything in my scene for him. I am quite pleased with it so far, however work still needs to be done on the mouth, feet and zip. As well as this I need to play around with texturing. However I am very happy with the orange and purple textures I created with the ramp shader. Not so much the lip and zip textures - must redo. He has been lit quite poorly aswell as accidently saving the renders as BMP's so bad quality. Good start none the less, and hopefully should have finished for Dave tommorow lunchtime.
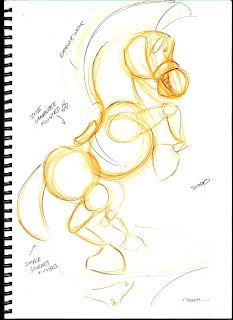
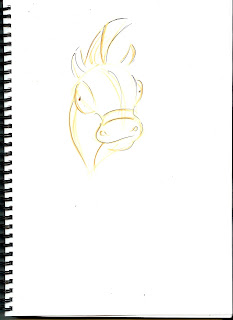
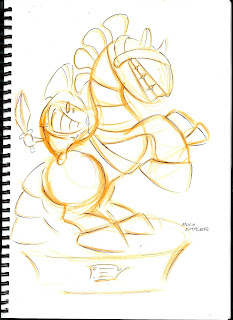
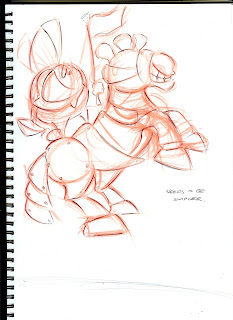
Few Statue Concepts...
Below are a few doodles I produced tonight to express the type of statue I am now after. I focused on my new horse idea, as well as including my best muscley statuie concept.I particularly like the one I skecthed in orange with pony sitting on the back, and the horse has no eyes - just a big cheesy grin! I have kept them simple and geometric so that they will be quick and easy to model, aswell as fit in with our childish theme. I may add a few swirls here and there to the final design. But for now I'm quite happy, as long as its modelled by the end of the week!


Sunday, 9 November 2008
This weeks tasks..
Monday - Model character, texture, and create simple blendshapes for mouth and eyes.
Tuesday - Finish character, picture frames,
Wed - architecture under stairs - texture stairs
Thurs - Statue
Fri - Statue, wall struts, chanderleers (possibly)
This means I have gone over my modelling deadline by 2 days, however this plan does included some texturing work, so hopefully I won't need as much time as I had planned on texturing and lighting (already started my room lighting) so it should even itself out. Fingers crossed...
Change in Plan for the Statue (Again!)
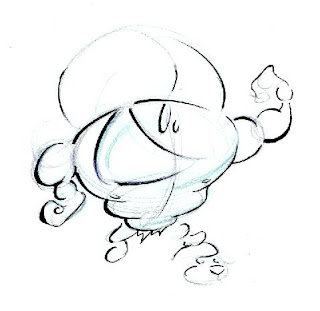
Right, well i know i decided upon the idea for the statue to be him holding the world, but.... it's not working. Because of our characters body shape and his afro its almost impossible to come up with a design which would work or won't take ages to model. If we want him to have over exagertaed muscles and stuff its just going to take to long to model. Originally I wanteds something along the lines of the hulk but with our guys face....
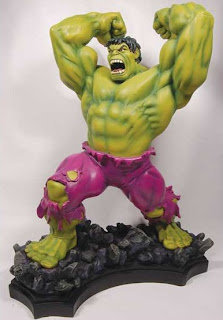
But the more I thought about it, the harder it was going to be, and the more time consuming it would become aswell. As well as this I kept thinking that a really realistic toned muscely body doesnt fit in with our unrealistic wacky simplistic designs so far. And to make things worse - fitting a globe in his hand without overlapping his afro is harder than you think!! Ive sketched so many ideas but its just not happening!
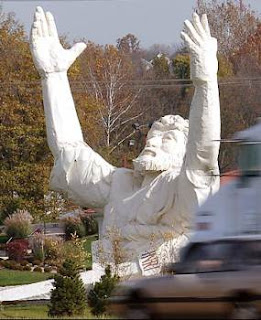
So i resorted to looking into some other simpler inspirations for the statue but each has its problem.....
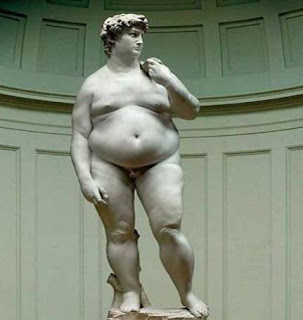

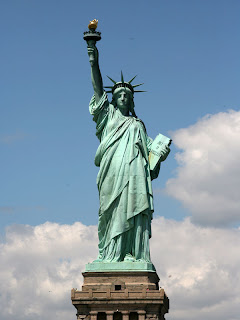
Then I started thinking along the lines of famous heroic statues - and Joan of Arc came to mind.
It is the statue in which he is mounted on a horse, carrying a flag.
This would be perfect too boost our pony's ego as it gives the effect that he believes he is a strong, battling warrior! However obviously I would have to simplify a horse down, as this would be just as tedious and if not more time consuming than a muscley body.
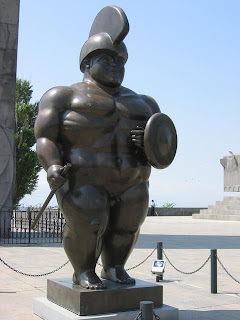
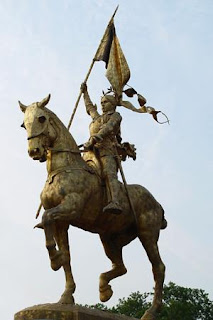
I then came across these 3 images after looking for modern/simple/Joan or Arc statues!
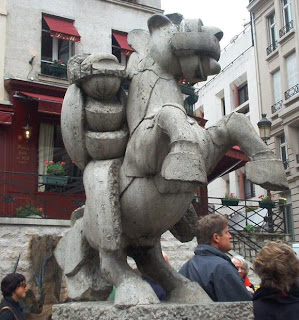
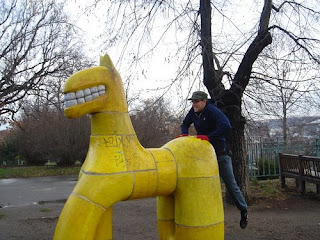
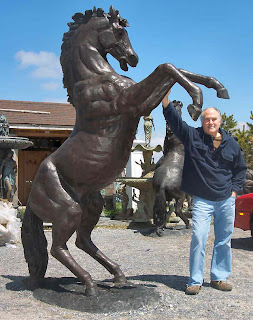 I love the simplicity of the yellow horse, and it fits the style we're after. I also love the simple geometric shapes that make up the one on the far left which is actually situated in Paris. The pose of the horse in the picture with the man standing next to it is the pose I would put the horse in, as if its reering up. I believe I can model a simple funky looking horse quicker than a muscley body and globe. Plus then when I've finished the horse I can just duplicate the character model I'm going do this week, add a spear/flag and helmet to him, texture him in stone and sit him on the horse. Should be easier, I say should. As for the joke of the globe falling on him at the end of the scene, I still want to keep a similar joke to end my scene. It should be easy to make a section of the statue break off and crush him while posing. Guys if your reading let me know your thoughts on the new idea as I will probably start sketching up simple horses tonight...

But the more I thought about it, the harder it was going to be, and the more time consuming it would become aswell. As well as this I kept thinking that a really realistic toned muscely body doesnt fit in with our unrealistic wacky simplistic designs so far. And to make things worse - fitting a globe in his hand without overlapping his afro is harder than you think!! Ive sketched so many ideas but its just not happening!
So i resorted to looking into some other simpler inspirations for the statue but each has its problem.....


Then I started thinking along the lines of famous heroic statues - and Joan of Arc came to mind.
It is the statue in which he is mounted on a horse, carrying a flag.

This would be perfect too boost our pony's ego as it gives the effect that he believes he is a strong, battling warrior! However obviously I would have to simplify a horse down, as this would be just as tedious and if not more time consuming than a muscley body.
I then came across these 3 images after looking for modern/simple/Joan or Arc statues!


 I love the simplicity of the yellow horse, and it fits the style we're after. I also love the simple geometric shapes that make up the one on the far left which is actually situated in Paris. The pose of the horse in the picture with the man standing next to it is the pose I would put the horse in, as if its reering up. I believe I can model a simple funky looking horse quicker than a muscley body and globe. Plus then when I've finished the horse I can just duplicate the character model I'm going do this week, add a spear/flag and helmet to him, texture him in stone and sit him on the horse. Should be easier, I say should. As for the joke of the globe falling on him at the end of the scene, I still want to keep a similar joke to end my scene. It should be easy to make a section of the statue break off and crush him while posing. Guys if your reading let me know your thoughts on the new idea as I will probably start sketching up simple horses tonight...
Subscribe to:
Posts (Atom)